
WARNING
Please note that the content may no longer be applicable.
Archlinux snapper setup
Warning: If you break your system by blindly copying and pasting commands, it is not my fault.
This is just my way of doing this. It works for me, but I can’t guarantee it will work for you.
This is a guide to set up Snapper on Arch Linux for Btrfs if you use the Archinstall suggested partition layout. I will walk you through the process of installing Snapper with that layout ONLY.
Dependencies
- snapper (Needed)
- btrfs-assistant (Recommended)
- snap-pac (Recommended)
- grub-btrfs (Optional)
- snap-pac-grub (Optional)
- refind-btrfs (Optional)
I usually just install most of them like this:
yay snapper btrfs-assistant snap-pac grub-btrfs snap-pac-grub
First step
Delete pre-mount snapshots:
sudo umount /.snapshots
sudo rm -r /.snapshots
This is needed because it will allow the user to use Snapper to make a new config.
Second step
Create a config with Snapper:
sudo snapper -c root create-config /
Remove existing snapshots:
sudo btrfs subvolume delete /.snapshots
sudo mkdir /.snapshots
Mount it:
sudo mount -a
Last step
List all subvolume:
sudo btrfs subvol list /
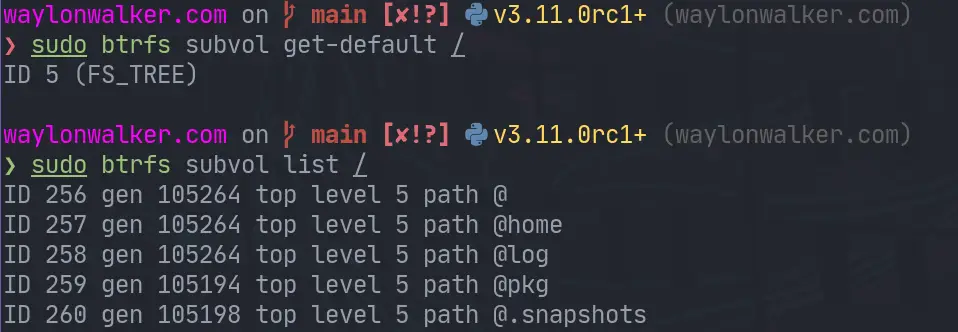 image from waylonwalker
Set @ as default:
sudo btrfs subvol set-default 256 /
sudo btrfs subvol get-default /
It should be all good now. If you run into any issues, you can try reading the following resource:
Leave a comment